Help resources for grow2serve.net
Facilitators' Help Book
grow2serve.net Help Book
Navigating within Your Course
The most basic interaction with your online course on grow2serve.net will require you to know how to navigate effectively within the course main page, weekly page and activities.
Course Main Page
This is an example of a course main page:
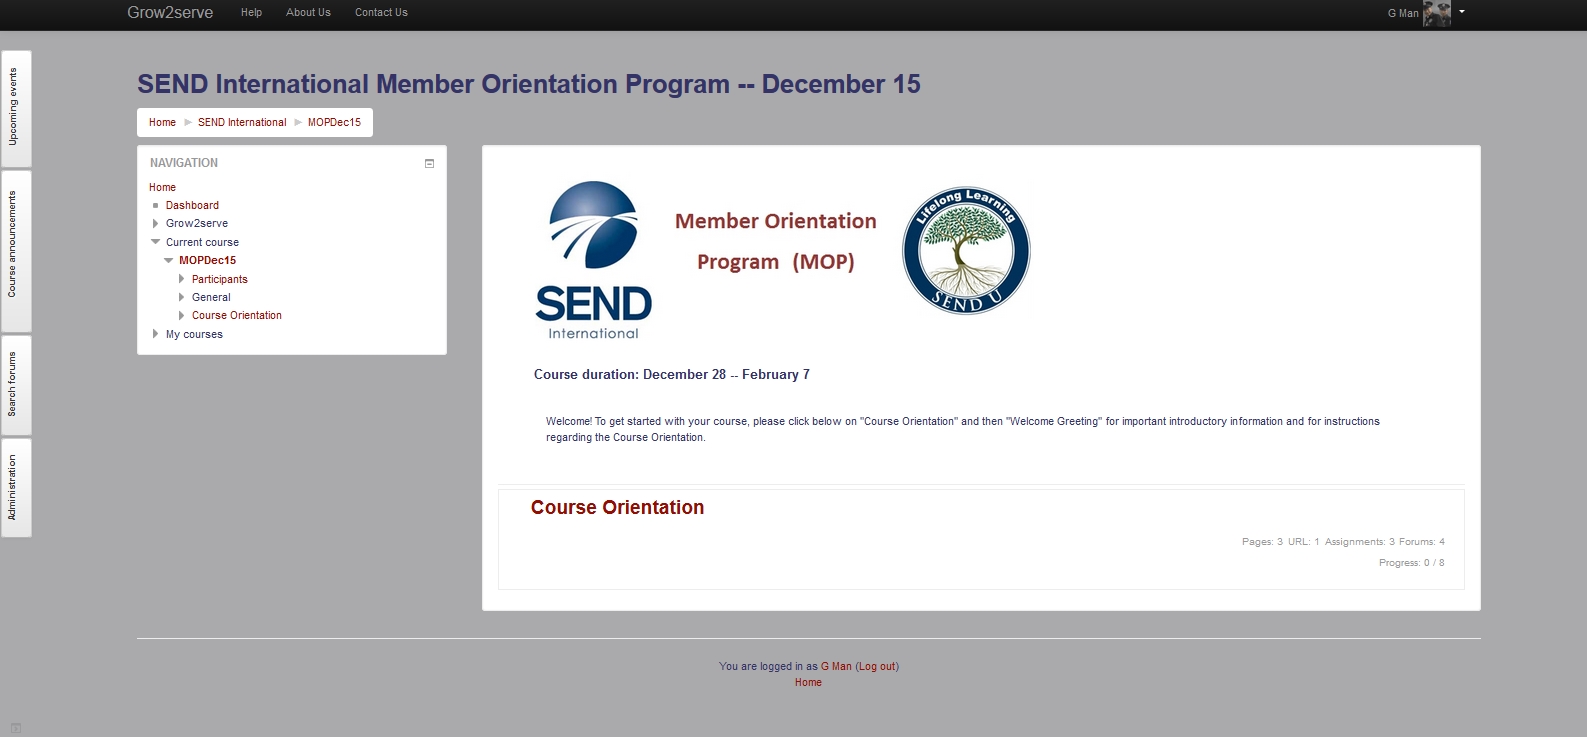
The course main page consists of five (5) regions, each of which you will want to be familiar with.
Header
The first region of the course main page is the Header:

The Header contains four important elements: 1) the name of the course, 2) a pull-down for user-specific settings, including your Dashboard, Profile, Preferences, and Log Out, 3) breadcrumbs that show where you are in the course, and 4) menu links to Help, About Us and Contact Us.
Clicking on your name (2) will take you to your grow2serve.net profile.
Clicking on any of the words in the breadcrumbs (3) will take you to that location in the site or course. For example, clicking on the "shortname" of your course ("MOPDec15" in the example above), will take you to the main page of your course.
Navigation Block(s) and Docked Navigation Block(s)
The next region of the course main page is the Navigation tray on the left:
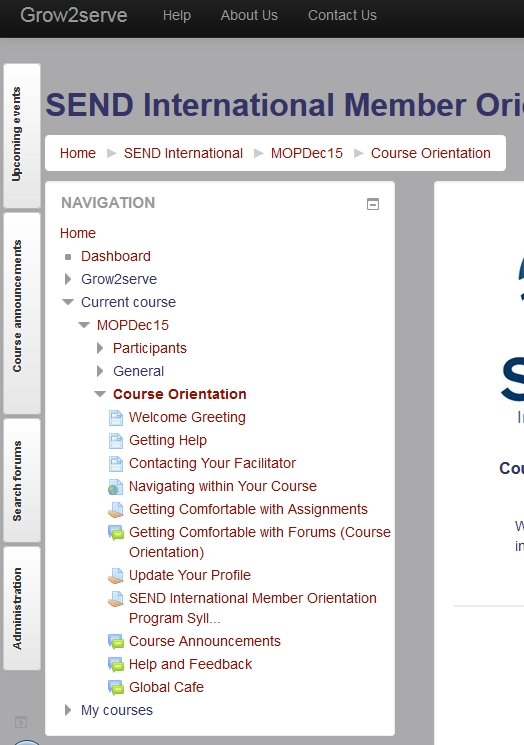
The Navigation block region may contain one or more navigation blocks that provide quick links for you to move around grow2serve.net conveniently. If blocks are not visible in expanded form, they will be present on the far left edge of the page in a smaller format stored in the "dock."
Dock for Navigation Block(s)

As seen in the above picture, the dock consists of a series of small versions of the various blocks available in the course. As you hover over one of the blocks, it expands and the links within the block become available. In addition to the navigation block (which always stays in an expanded format), the following blocks can be found docked on the left edge of the page:
- Upcoming Events: a list of the most imminent due dates and other events in your course. This block also contains a convenient link to the Course Calendar, in which all due dates for all activities are displayed in a graphical format.
- Course Announcements: course announcements posted by the facilitator
- Administration: contains links for adjusting administration settings
- Search Forums: a convenient tool for searching for specific discussions that you may have trouble finding otherwise.
Please note that you have the freedom to move blocks back and forth between the dock and the expanded format. However, the recommended layout is to keep the navigation block in the expanded form and the remaining blocks in the dock.
Footer
Moving counter-clockwise, the next region of the course main page is the Footer.

The Footer contains an additional links for going to your Profile, Logging Out, and viewing the Home Page of grow2serve.net.
Content Pane
The final region of your course main page is the Content Pane:
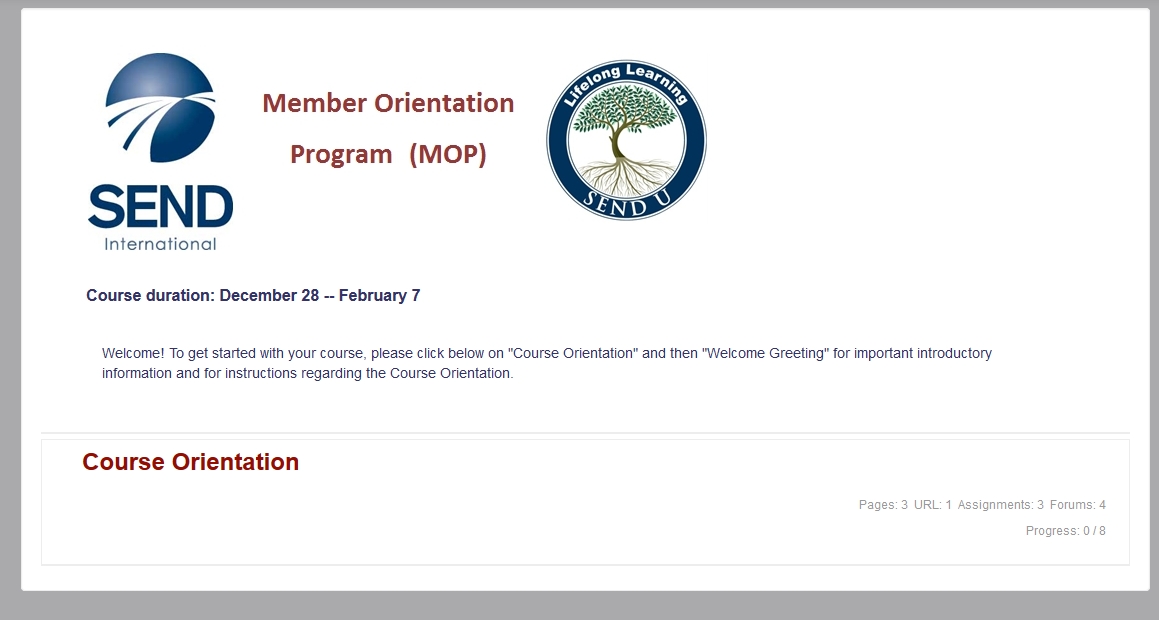
The Content Pane contains a header, a list of all of the topics/weeks of your course, and a status report for your completion of elements within that week or topic. Listed is the number of various types of elements followed by a progress report (i.e. 0/8 in this case) which indicates the number of items completed out of the total "markable as complete" items in the topic. Some items in a topic (like optional items) cannot be marked as complete.
Week Page
Clicking on the name of one of the topics or week will take you to the week page:
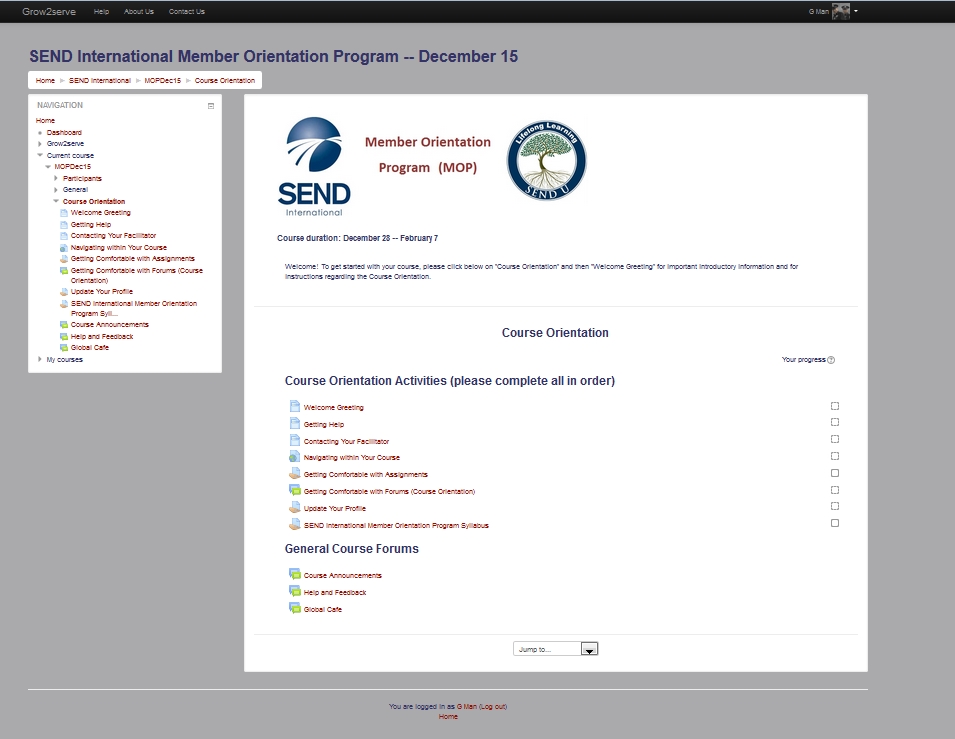
Notice that the week page has all the same elements as does the course main page. However, the content pane displays different information than the course main page.
Each element of the week or topic is displayed in the order in which the activities should be completed. Each activity has an icon to the left of the name of the activity indicating what kind of activity it is (assignment, forum, quiz, etc.) Clicking on the name of the activity will take you directly to that activity.
The check-boxes to the right of the name of an activity indicate the completion status of that activity. Solid check-boxes are for activities that you as the learner will need to manually check off in order to show that activity as complete. Dashed check-boxes will be filled in automatically by the system as you complete the instructions given in the activity.